
Key Takeaways
- Turning off Lens Correction may improve color in iPhone photos, but results can vary. Try this setting in Camera settings.
- Switching from ProRAW Max to HEIF Max can improve image quality by adding some processing. Experiment with your camera settings.
- Trying different Photographic Styles can warm up gray photos. Select a style in the Camera app or through the settings for a change.
While scrolling through TikTok may not be the solution to all of your tech problems, you can learn a surprising amount from the comment sections of certain posts. A post from influencer Alix Earle complaining about how all her iPhone 15 photos turned out gray and washed out garnered more than 684,000 likes and more than 1,700 comments. And while some of the comments were the standard banter, many of them were from people weighing in with solutions that they’d found to fix their own washed out iPhone 15 photos.
You won’t believe which music giant just returned to TikTok
Hint: It has a roster of A-list artists, including Taylor Swift, and after controversially removing its music from TikTok, it’s finally coming back.
I tried some of them out to see if they would work for me, with varying levels of success.
I then fell down a bit of a rabbit hole of TikTok comments trying to find some other useful suggestions buried beneath similar videos, and I was surprised to learn some tips that I didn’t know. I tried some of them out to see if they would work for me, with varying levels of success. Here are six suggestions for fixing gray iPhone photos that I found in TikTok comments.
1 Turn off Lens Correction
Didn’t make a huge difference for me, but some users rave about it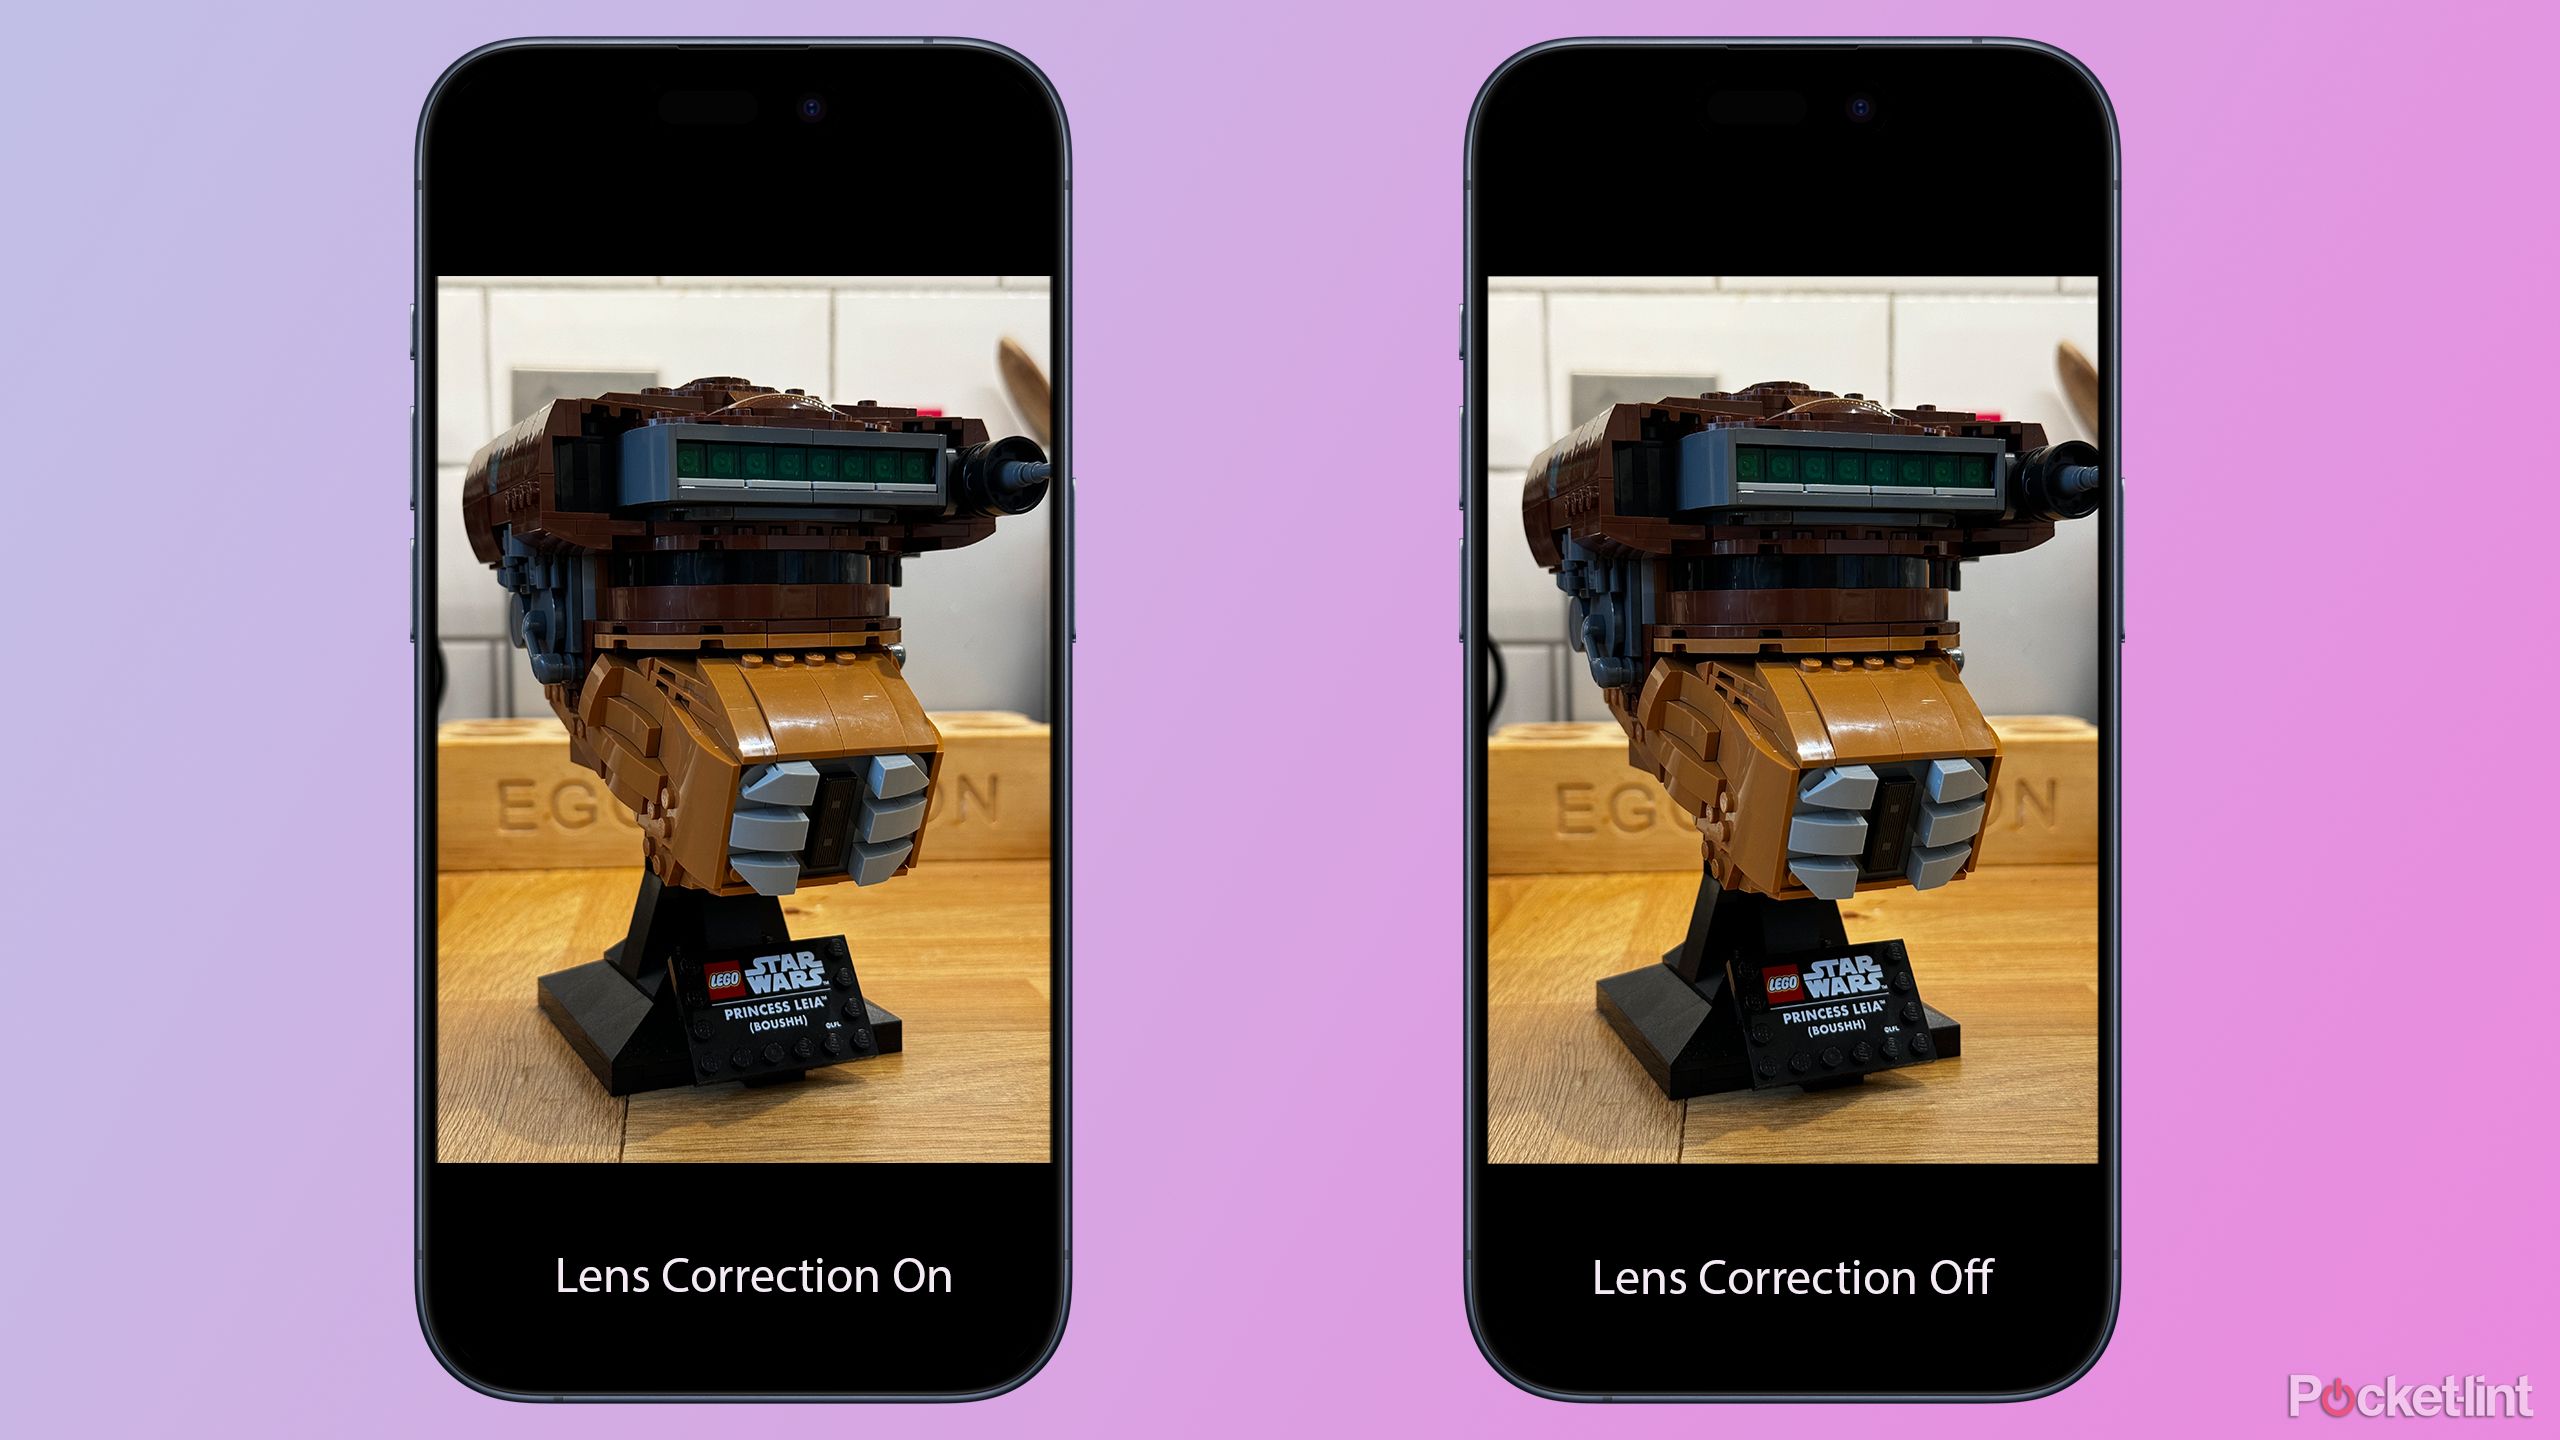
One of the top suggestions for fixing gray-looking photos on the iPhone 15 was to turn off lens correction. This is a method that appeared to work for many of the other people in the comments — for photos taken with both the front and rear cameras.
Lens correction is a way to correct distortions caused by camera lenses.
Lens correction is a way to correct distortions caused by camera lenses. On your iPhone, the shape of the lens can make straight lines appear slightly curved or give your images a slight fish-eye look. Lens correction is one of those hidden iPhone camera settings that fixes these issues using software to correct the image.
As you can see from the photos above, changing this setting didn’t make a hugely noticeable difference to my images. However, some TikTok users have said that they found that turning lens correction off improved the color of their photos and stopped them from appearing so gray, although this is purely anecdotal evidence.
- Open the Settings app on your iPhone
- Scroll down and select Camera
- Near the bottom of the page, toggle Lens Correction off

As a pro photographer, these are my favorite iPhone camera apps
These are the apps I turn to when I want to get the most from my iPhone’s camera.
2 Try turning off ProRAW Max
Shooting RAW could make some images appear washed out

Another popular suggestion related to ProRAW Max, which captures your images in RAW format at high quality. This was the topic of the most popular comment thread underneath Alix Earle’s post, but it was full of contradictory suggestions with some saying to turn ProRAW on, and others suggesting that people turn off ProRAW and use HEIF Max.
Shooting RAW means capturing minimally processed data from your camera’s image sensor. This allows you to edit your photos in apps such as Lightroom, and make changes to things such as the white balance or exposure settings after the fact, to get the exact result that you want.
Other formats, such as HEIF, perform some processing of the image on your iPhone, so the resulting photos can look less washed out on your phone than the RAW images. HEIF Max is a format that takes 48MP images but compresses them using the HEIF format so that they’re much smaller than the equivalent RAW file.
It would make sense, then, that switching from ProRAW Max to HEIF Max should make your photos look better immediately after you’ve taken them, since they will have had some processing performed on them. RAW images will give you more leeway when it comes to editing them later, but as they are unprocessed on your camera, they can often look more washed out.
I tried it for myself — as shown in the image above — and found that I got a more washed out image (right) with ProRAW turned on. When it was toggled off, I found it produced a warmer image (left).
Shooting with ProRAW off may not result in the same results every time, and there are other factors — like lighting — to consider, but it did work for myself and many TikTok users.
ProRAW may produce images that can look more washed out, but it does have benefits if you want to edit your photos manually, since your image is captured uncompressed. This comes with a major downside: A photo saved in ProRAW Max takes up 15 times more storage space than a photo saved in HEIF Max format, so shooting in this mode can chew through your storage space.
Shooting in ProRAW mode can chew through your storage space.
These ProRAW options are only available on the iPhone 15 Pro and iPhone 15 Pro Max, so you won’t don’t have to worry about this setting on an iPhone 15.
- Open the Settings app
- Select Camera
- Tap Formats
- Toggle ProRAW & Resolution Control on if it’s not already
- Tap Pro Default
- Select HEIF Max (up to 48MP)
- When you’re using the camera app, toggle between HEIFMax and standard photos by tapping the HEIF MAX icon at the top of the screen

What is Apple ProRAW? How to shoot RAW images on iPhone (and why you’ll want to)
Have an iPhone Pro? Turn on Apple ProRAW for more editing capabilities.
3 Turn off View Full HDR
A Photos setting, not a Camera setting

Another suggestion that many users said seemed to work for them was to turn off the View Full HDR settings in the Photos app. This setting doesn’t affect how your photos are captured, but it does change how they’re displayed on your iPhone. HDR is a complex topic, and while turning this setting off may make some photos look less washed out, it’s possible that it might have the reverse effect in some contexts, so its definitely worth trying it out to see what results you get with your particular image.
When I tried changing this setting, I found that there was little obvious difference between the two images, but this is definitely one case where not only may your mileage vary, but it’s also likely to vary from image to image.
On older iPhones such as the iPhone 12, it’s also possible to turn off automatic HDR when capturing your photos, but this is no longer possible on the iPhone 15, for some reason known only to Apple.
- Open Settings
- Tap Photos
- Scroll down and toggle View Full HDR off
What is Ultra HDR? Everything you need to know about the new imaging format
Google tries to take photography into a whole new era with Ultra HDR. Here’s everything you need to know about the new image format.
4 Turn off or select Photographic Styles
Set your own default style

If your photos look different from what you’d expect, you may have inadvertently turned on a Photographic Style. These are camera settings that you can select which will apply to all the photos that you take. If you find your photos are looking gray, you can also try using one of these Photographic Styles to see if that improves things. You can select Photographic Styles in the Camera app, and in the Camera settings.
Selecting a Photographic Style made a noticeable difference to my photos. As you can see above, the photo taken with the Rich Contrast style is much warmer than the original image, so using this or a similar Photographic Style could be a good fix if all of your photos seem to be washed out. Once again, however, your mileage may vary.
- To select a Photographic Style in the Camera app, tap the arrow at the top of the screen
- Tap the Photographic Style icon between the Live Photos and Aspect Ratio icons
- Scroll left to select a Photographic Style
- You can edit the Photographic Style by tapping the Tone and Warmth values and changing them
- To select a Photographic Style through the settings, open the Settings app and select Camera
- Scroll down and tap Photographic Styles
- Swipe left to view different styles and tap the Use button to select one

How I take astrophotography with my phone and 4 gadgets that help
Capturing the night sky with a phone might seem impossible, but there are a few tricks that can make it happen. Here, we present our expert insights.
5 Swipe instead of tap
A quick way to remove any camera settings

If you are using Photographic Styles, there may be times when you quickly want to take a photo without the Photographic Style applied. Another TikTok comments hack I learned is that it’s possible to do so by swiping instead of tapping.
Instead of tapping the Camera button to take a photo, swipe it quickly to the left and then release. Swiping left starts the Burst mode, but if you release straight away you’ll only take one image, and it won’t use any of your current camera settings. The Photographic Style won’t be applied.
As a pro photographer, these are my favorite iPhone camera apps
These are the apps I turn to when I want to get the most from my iPhone’s camera.
6 Apply an edit to photos already on your camera roll
Save time by pasting your edits to other photos

After going through a TikTok rabbit hole, I was then lead to a Reddit discussion post and found this game-changing trick. Changing the settings to stop your iPhone 15 photos from being gray is all well and good, but what about all those gray photos you’ve already got on in your Camera Roll?
You can edit your iPhone photos and change a whole range of settings from the exposure to the saturation, but if you find a set of edits that turn your photo from gray to perfection, you’ve then got to apply them to all of your other gray photos, and if you have a lot of them, that could take forever.
Thankfully, there’s a way to copy an edit from one photo and apply it to as many others as you wish, so you can fix all your gray photos at once.
- Select any photo you want to edit
- Tap Edit in the top right-hand corner
- Swipe through the editing options and drag the slider left or right to change the values
- Repeat until you’re happy with the look of your photo
- Tap the Three Dots icon in the top-right of the screen and select Copy Edits
- Return to the main Camera Roll and tap Select at the top of the screen
- Tap all the photos that you want to apply the same edits to
- Tap the Three Dots icon in the bottom right of the screen
- Select Paste Edits
- The same settings will be applied to all of the selected photos

My 5 must-try Photoshop tips to edit photos in 5 minutes or less
Photoshop is a powerful editing tool but it’s easy to get lost in all the different tools. Here are five tips for quickly editing your images.
Trending Products


